
extra-captiveflask repository

the wp3 now have an extra-captiveflask templates for community send all your customs captiveflask templates. this is awesome, because all users can do download and use your custom template. checkout the docs bellow: template extra-captiveflask

description

the plugin captiveflask allow the Attacker mount a wireless access point which is used in conjuction with a web server and iptables traffic capturing rules to create the phishing portal. Users can freely connect to these networks without a password and will often be directed to a login page where a password is required before being allowed to browse the web.

What is Wireless Phishing?

Wireless phishing is any technique by which an attacker attempts to convince wireless network users to divulge sensitive information. As we previously mentioned the associated wireless network is generally open and access to network resources is mediated by a web application known as a captive portal. A captive portal is a web page accessed with a web browser that is displayed to newly connected users of a Wi-Fi network before they are granted broader access to network resources. Captive portals are commonly used to present a landing or log-in page which may require authentication, payment, acceptance of an end-user license agreement or an acceptable use policy, or other valid credentials that both the host and user agree to adhere by. (Wiki)

Creating Captive Portal template

For the interested, we give a brief technical overview of the process of creating a phishing portal here. Example configuration files for creating a simple captive portal template to Wp3. first of all you need to make a repository fork and add your plugin template. Example configuration files for creating a simple template.
# file => ExamplePlugin.py
from wifipumpkin3.plugins.captiveflask.plugin import CaptiveTemplatePlugin
import wifipumpkin3.core.utility.constants as C # import plugin class base

class ExamplePlugin(CaptiveTemplatePlugin):
    Name = "ExamplePlugin"
    Version = "1.0"
    Description = "Example is a simple portal default page"
    Author = "mh4x0f"
    TemplatePath = C.TEMPLATES_FLASK + "templates/example"
    StaticPath = C.TEMPLATES_FLASK + "templates/example/static"
    Preview = C.TEMPLATES_FLASK + "templates/example/preview.png"

File architecture

ExamplePlugin/
├── preview.png
├── static
   ├── css
   ├── bootstrap.min.css
   ├── main.css
   ├── styles.css
   └── util.css
   └── js
       ├── bootstrap.min.js
       ├── jquery-1.11.1.min.js
       └── main.js
└── templates
    ├── login.html
    └── login_successful.html

4 directories, 9 files

Editing html files

Set Up the Phishing your custom page login captive portal login.html
<!DOCTYPE html>
<html >
<head>
<title>Authentification</title>
<link rel="stylesheet" type="text/css" href="{{ url_for('static', filename='css/util.css') }}">
<link rel="stylesheet" type="text/css" href="{{ url_for('static', filename='css/main.css') }}">
</head>
<body >
  <div >
    <!-- Page content -->
    <form method="POST" >
      Login:<br>
      <input type="text" name="login">
      <br>
      Password:<br>
      <input type="text" name="password">
      <br><br>
      <input type="submit" value="Sig up">
    </form>
  </div>
</body>
</html>

Set Up the Phishing your custom page login successful login_successful.html
<!DOCTYPE html>
<html >
<head>
  <title>Authentification</title>
  <link rel="stylesheet" type="text/css" href="{{ url_for('static', filename='css/util.css') }}">
  <link rel="stylesheet" type="text/css" href="{{ url_for('static', filename='css/main.css') }}">
  </head>
    <h1>Login successful</h1>
  </body>
</html>

Add language into the guest portal

if want to create multiple language that allow the user to pick a different one, checkout!
# file => ExamplePlugin.py
from wifipumpkin3.plugins.captiveflask.plugin import CaptiveTemplatePlugin
import wifipumpkin3.core.utility.constants as C # import plugin class base


class ExamplePlugin(CaptiveTemplatePlugin):
    Name = "ExamplePlugin"
    Version = "1.0"
    Description = "Example is a simple portal default page"
    Author = "mh4x0f"
    TemplatePath = C.TEMPLATES_FLASK + "templates/example"
    StaticPath = C.TEMPLATES_FLASK + "templates/example/static"
    Preview = C.TEMPLATES_FLASK + "templates/example/preview.png"
    Languages = ["En", "ptBr"] # the En is default 

File architecture

ExamplePlugin/
├── preview.png
├── static
   ├── css
   ├── bootstrap.min.css
   ├── main.css
   ├── styles.css
   └── util.css
   └── js
       ├── bootstrap.min.js
       ├── jquery-1.11.1.min.js
       └── main.js
└── templates
   ├── En
   └── templates
       ├── login.html
       └── login_successful.html
   └── ptBr
       └── templates
           ├── login.html
           └── login_successful.html

9 directories, 13 files

Install the template

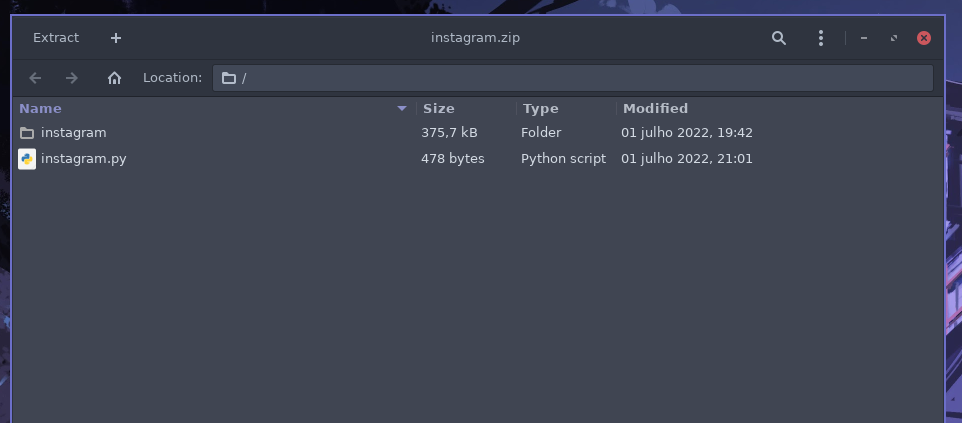
Great, After that we need to build a file .zip with file instagram.py and folder instagram. Exist two way or more to build a .zip file with this files: 1 - create using the command zip on terminal 2 - use the manager file that have a option for build .zip file compress options.

Using the terminal

Open the terminal in my case on git folder and type the command bellow:
zip -r instagram.zip instagram instagram.py
captive00

Using the File Manager

Open the folder that have tow files and select and click with button right and compress selct the .zip and done. Result is: captive00

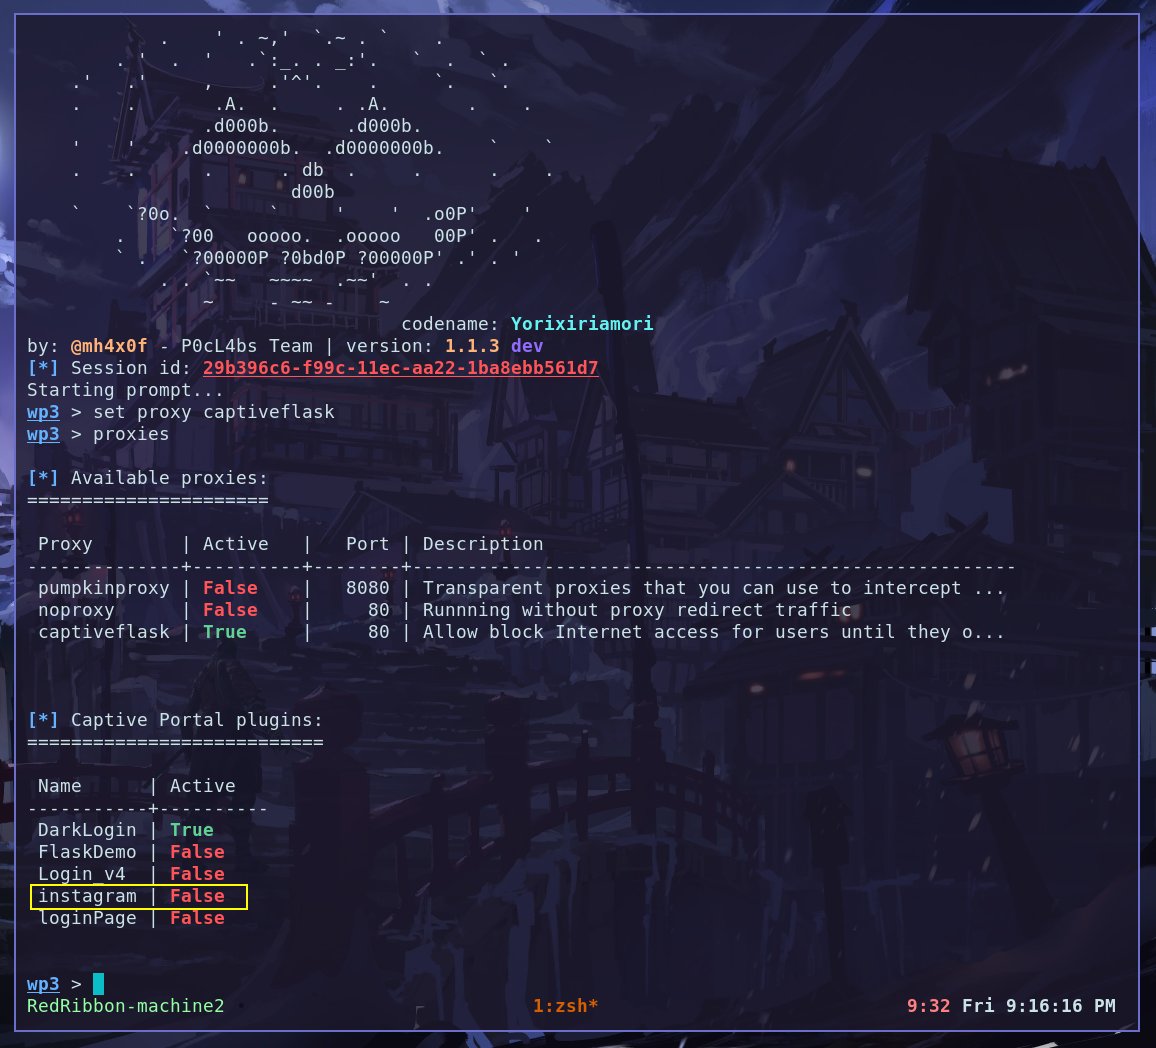
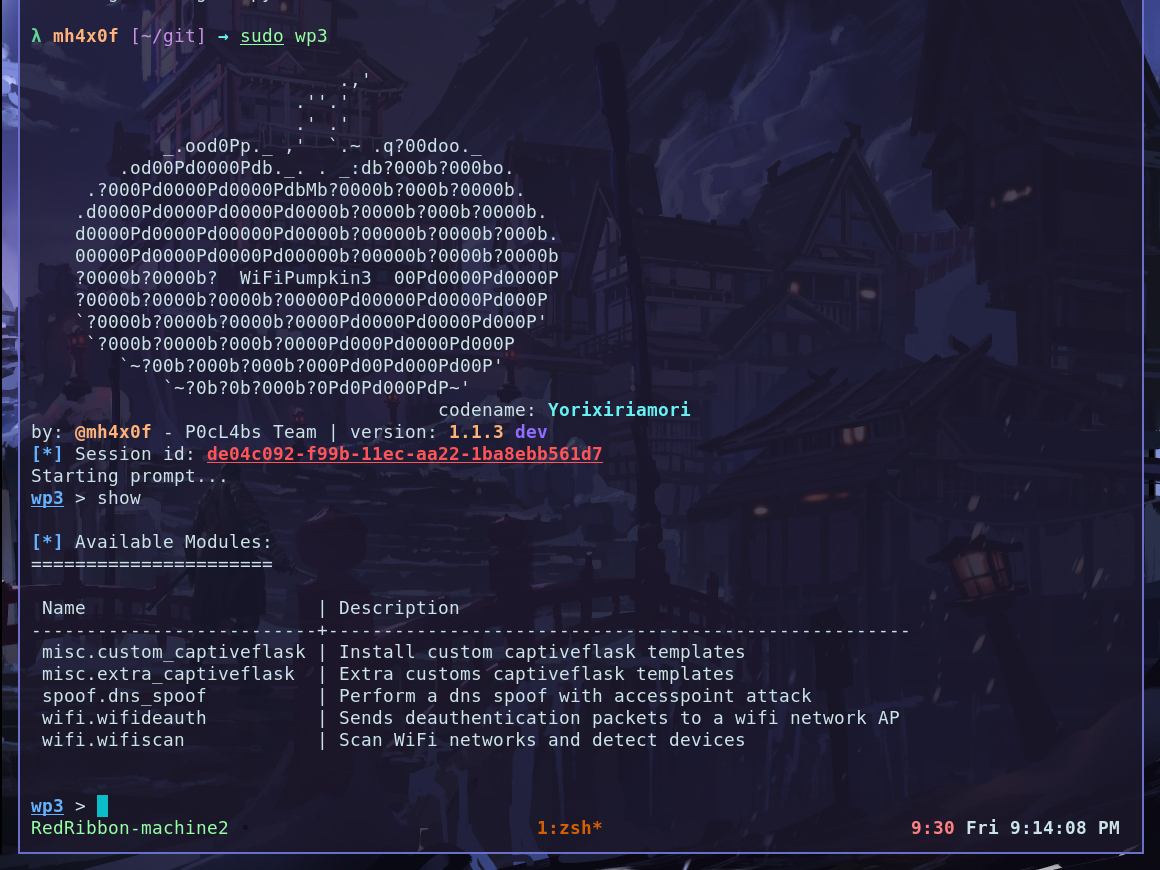
Install on wifipumpkin3 1.1.3

In the last version of the wp3 we have a new plugin called custom_captiveflask this plugin have only one option install. checkout: captive00 OBS: check the current directory is /git becasue the file instagram.zip is there. captive00 How to use the plugin: the first params is 
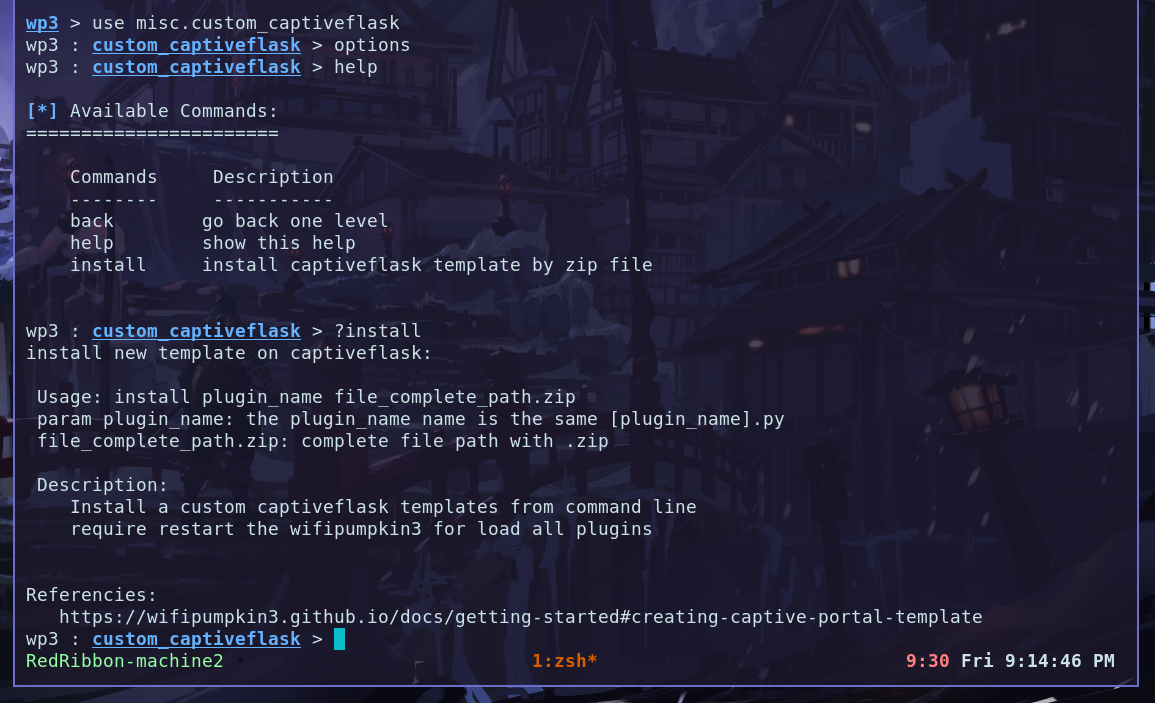
plugin_name and second is the file.zip. captive00 Restart the wp3 and checkout the new plugin instaled and working fine. captive00

Enjoy

now, you can choose to keep your custom version for yourself or send it to all wp3 users. have fun! Hack the Planet