OBS
- Windows is not supported.
- Mac OS X is not supported. only docker version, but has been not tested.
Requirements
You will need to have a Wi-Fi adapter that supports Access-Point (AP) mode. The following list of OSs represents recommended environments to runwifipumpkin3 (wp3), as most of required dependencies are pre-installed. VMs or docker are also recommended.
OS (recommended)
| OS | Version |
|---|---|
| Ubuntu | > 18.04 LTS |
| Docker | > Ubuntu 18.04 |
Tools (pre-installed)
- iptables (current: iptables v1.6.1)
- iw (current: iw version 4.14)
- net-tools (current: version (1.60+)
- wireless-tools (current: version 30~pre9-12)
- hostapd (current: hostapd v2.6)
Based on Debian procedure
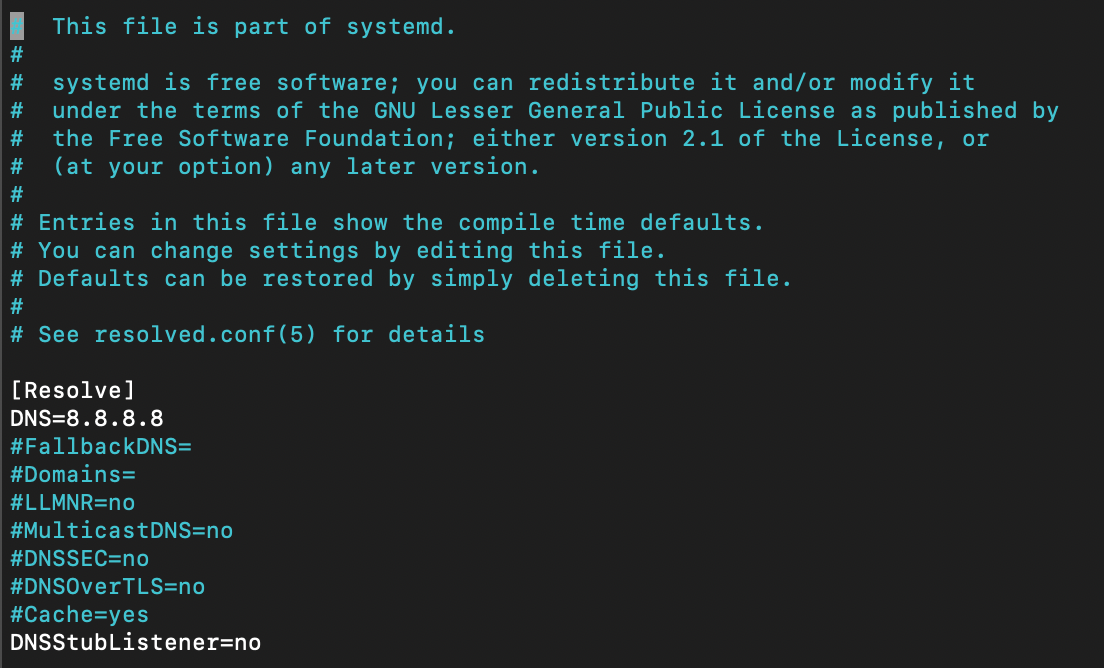
wifipumpkin3 use the port 53 for mount python dns server, when i try to install on Ubuntu 18.04, i got somes error because this “port 53 is used by another process”. This problem is caused by systemd-resolved to solve only follow the step bellow.- stop systemd-resolved ” sudo systemctl stop systemd-resolved”
- edit /etc/systemd/resolved.conf with these
- and execute this link file
sudo ln -sf /run/systemd/resolve/resolv.conf /etc/resolv.conf
 And done !! font Nitin Gurbani
Installation procedure
if you’ve python 3.7 or later installed on your machine, it very simple to install the Wp3. Follow the steps:Debian/Ubuntu
It is highly recommended install somes system packages, os-level dependencies.*.deb package from GitHub Releases
Install on Kali Linux ( 2022.2 ) or high
wp3 can be install fromapt command.
Install on Kali Linux
the Kali Linux by default has installed python3.8 is compartible withwp3, I recommend to install some system packages, os-level dependencies.
PyQt5, it very easy:
done, nice. the next step is install the wp3:
Finished processing dependencies for wifipumpkin3==1.0.0now, let’s execute the app:
wp3.
Installation python virtualenv
Virtualenv is a tool used to create an isolated Python environment. Virtualenv is the easiest and recommended way to configure a custom Python environment.root:
Finished processing dependencies for wifipumpkin3==1.0.0now, let’s execute the app:
wp3 on virtualenv activated.
When finished working in the virtual environment, you can deactivate it by running the following:
Installation on Docker Container
Docker is an open platform for developing, shipping, and running applications. Docker enables you to separate your applications from your infrastructure so you can deliver software quickly. thewp3 is full compatible to run on docker container. let’s go:
https://docs.docker.com/get-docker/with docker.io installed and working fine, let’s take a look how to mount a container with
wp3. how to install on ubuntu
wifipumpkin3, You’ll see Docker step through each instruction in your Dockerfile, building up your image as it goes. If successful, the build process should end with a message:
Successfully tagged wifipumpkin3Now you need to run your image as a container, start a container based on your new image:
wp3 on docker with mode docker activated. ;)
Installation on Docker-compose
Using the docker-compose.yml you can install thew p3. follow the steps,to build the image just run.
wp3 on docker with mode docker activated.
thank’s @rafonsecad
Need help? See our full documentation or join our community.